
While you draw, Cloudfarb records a timelapse – a sped-up video of how the artwork came together. You can watch it in the app and save it as an MP4 video. Timelapse is free.
How recording works
Recording is on from the start – there's nothing to tap. A frame is captured after you change something, no more often than about every second and a half, and never in the middle of a stroke. The frame shows what's on the sheet: strokes, effects, transforms, text.
A long artwork doesn't make the recording grow forever: once there are many frames, the app thins them out on its own, and the video stays even across your working time.
To turn recording on or off:
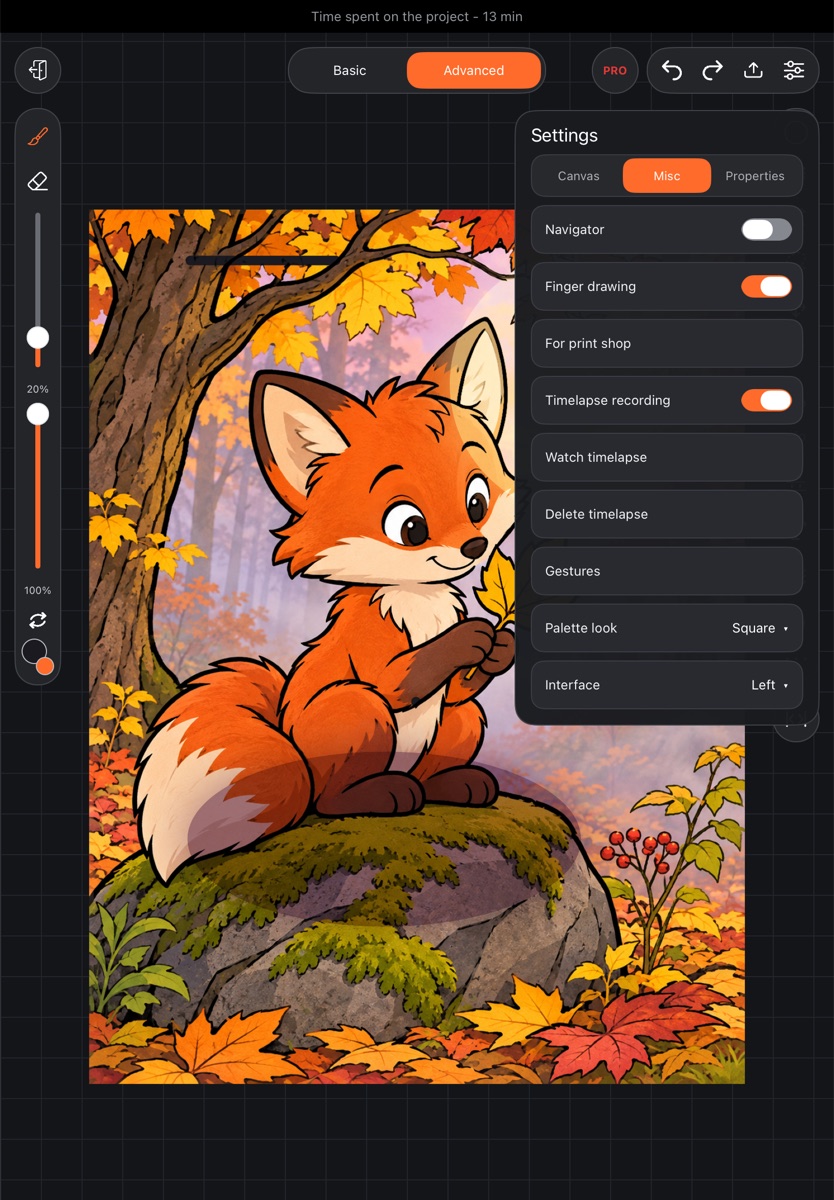
- In the artwork, tap Settings at the top right.
- Open the Misc tab.
- Toggle Timelapse recording.
The switch applies to all artworks. Turning it off keeps what's already recorded.
Watch it
- Settings → Misc → Watch timelapse.
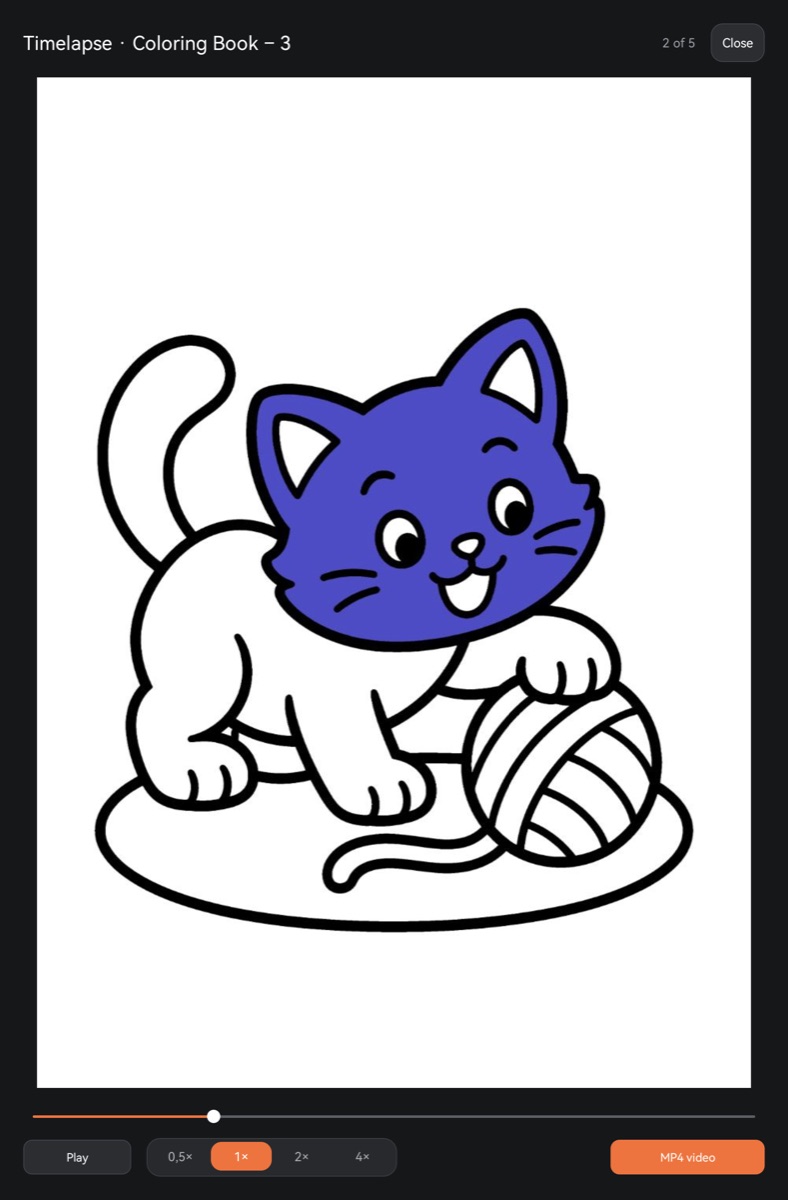
- A window titled “Timelapse · artwork name” opens.
In the window:
- Play and Pause;
- the slider under the picture jumps to any point, with a “frame of total” counter next to it;
- speed: 0,5×, 1×, 2×, 4×;
- Close returns to the artwork.
If nothing has been drawn yet, you'll see “The recording is empty: frames will appear once you start drawing”.
Save a video
- In the viewer, choose a speed – the video uses it.
- Tap MP4 video.
- The button shows progress: “Cancel · N%”. Tap it to cancel.
The video is at least 3 seconds and at most 10 minutes long. It holds the first frame for half a second at the start and the finished artwork for a second at the end.
On Android the video goes to Movies/Cloudfarb, and the “Video saved” message shows the path. On iPad and iPhone the system share sheet opens after saving, so you can save or send the video from there.
Storage and the cloud
Timelapse frames can take more space than the artwork itself. See how much under Settings → Properties, in the “Timelapse (this device only)” line.
The timelapse stays on this device only: it isn't uploaded to the cloud and won't appear on your other devices.
To free up space:
- Settings → Misc → Delete timelapse.
- The app asks first and shows how much space will be freed. Tap Delete.
The artwork itself doesn't change, but the timelapse can't be restored. If recording is on, it starts again from scratch.