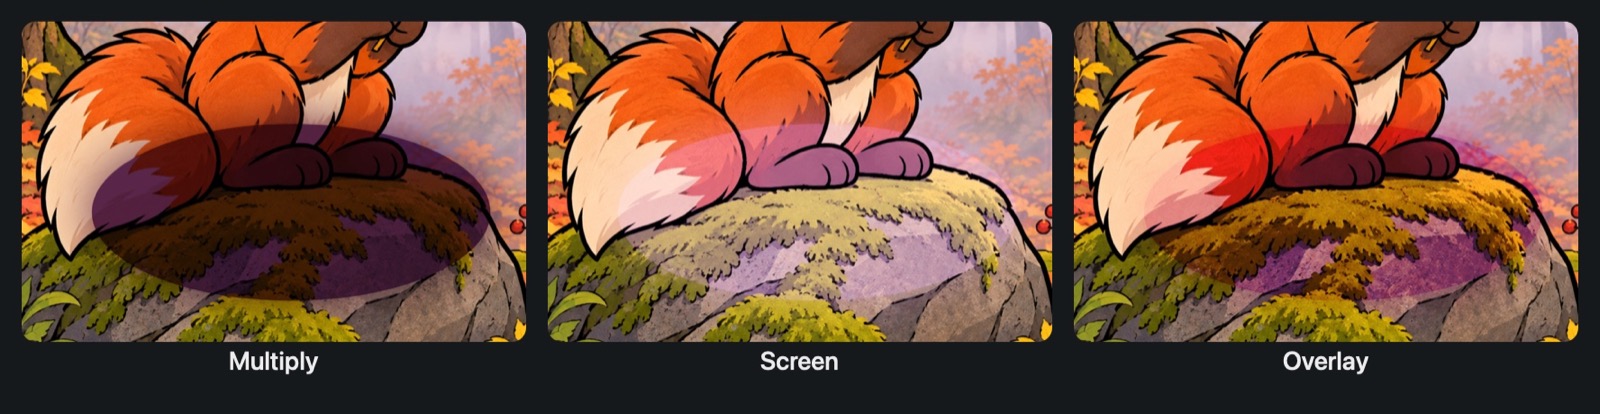
A blend mode sets how a layer's colors combine with what's below it. A normal layer simply covers the ones beneath; in Multiply, for example, the layer only darkens – great for shadows over a colored drawing.
Changing the mode
- Open Layers.
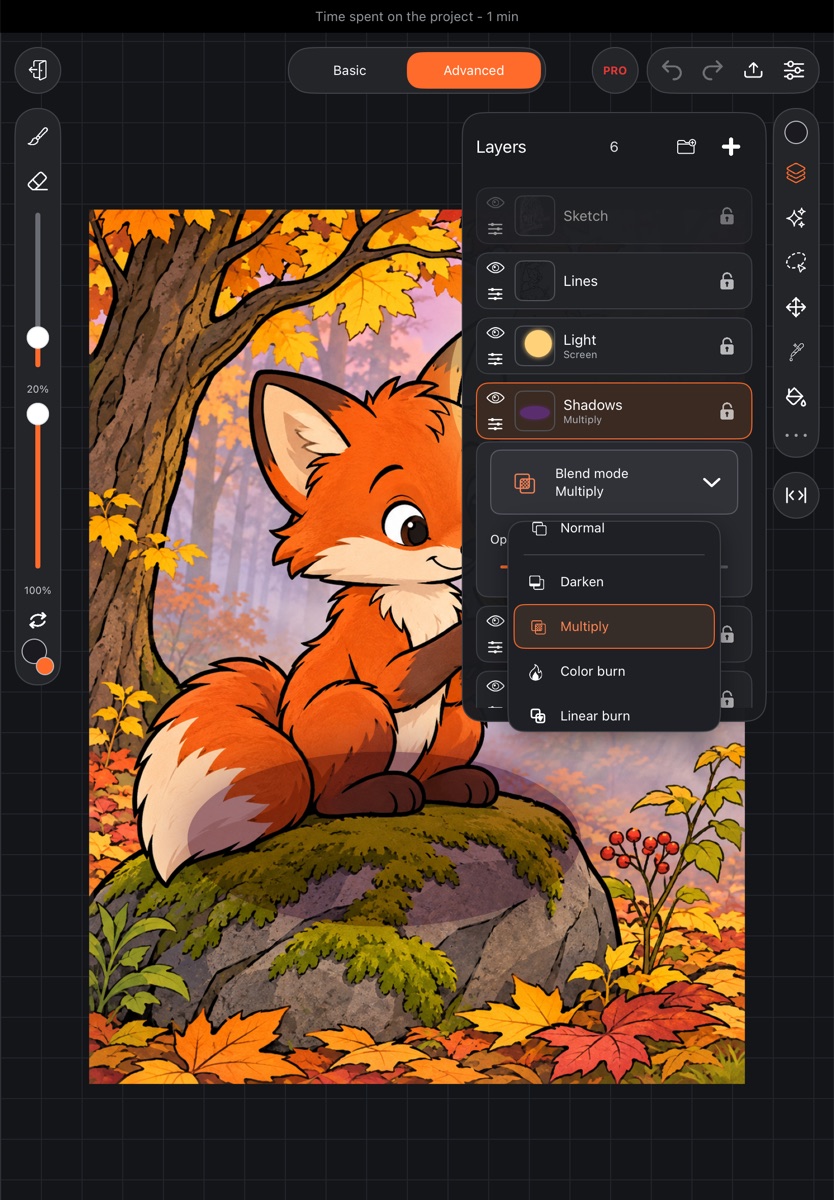
- Tap a layer to select it, then tap it again – its settings slide out below the row.
- Tap the Blend mode row – the list of modes opens.
- Choose a mode. The canvas shows the result right away.
If the mode isn't Normal, its name appears under the layer name in the list. Below the mode there's also the Opacity slider – an easy way to tone the effect down.
A layer group has no blend mode or opacity – only layers do.
Groups of modes
In the list, lines divide the modes into groups.
Normal – the layer sits on top as it is.
Darkening: Darken, Multiply, Color burn, Linear burn, Darker color. The result is never lighter than what's below; white barely shows. Good for shadows, hatching, and lines over color.
Lightening: Lighten, Screen, Color dodge, Add, Lighter color. The result is never darker than what's below; black doesn't show. Good for highlights, light and glow.
Contrast: Overlay, Soft light, Hard light, Vivid light, Linear light, Pin light, Hard mix. Light parts of the layer lighten, dark parts darken, and mid-gray hardly changes anything. Good for texture and richer color.
Comparison: Difference, Exclusion, Subtract, Divide. They work out the difference between the layer and what's below. Mostly for special effects, or to see how two similar layers differ.
Color: Hue, Saturation, Color, Brightness. They take just one property of color from the layer. Color, for instance, recolors the drawing below while keeping its light and shade.